TLDR: This article provides a comprehensive guide on building an advanced real-time chatroom application using Laravel Reverb, with user authentication and database storage for messages. It covers setting up the project, implementing authentication, creating the chat functionality, integrating real-time messaging, and persisting messages in the database. For the complete code and project files, visit the GitHub repository at https://github.com/aludvigsson/lara-reverb-chat-users-database.
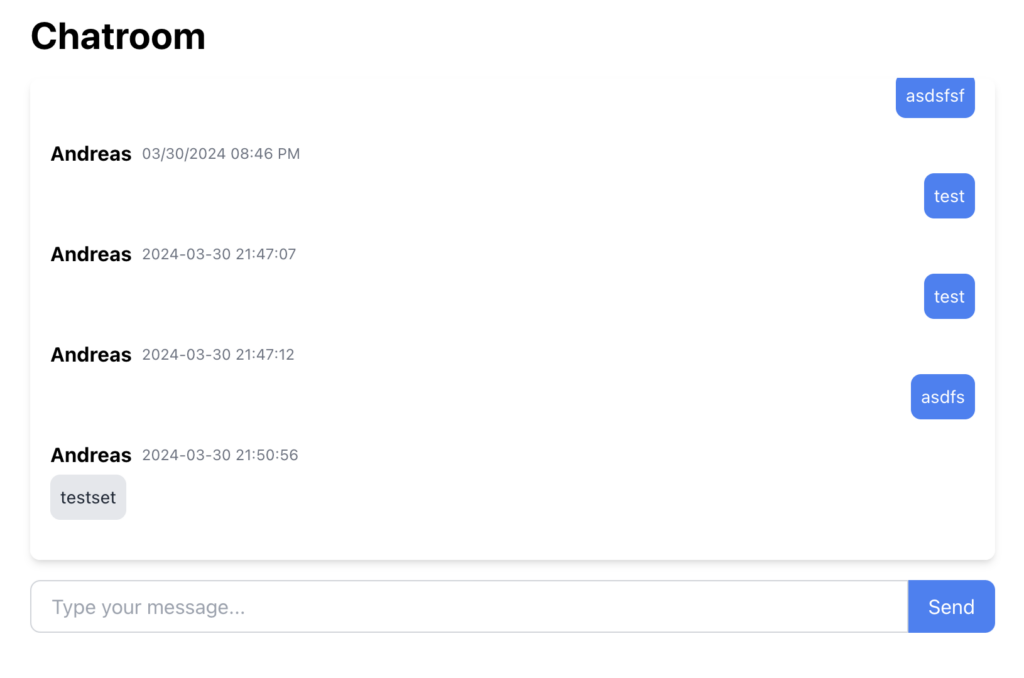
Table of Contents
Hey there, fellow Laravel enthusiasts! If you’ve come across my previous post about building a realtime chatroom using Laravel Reverb, you might have noticed how straightforward and simple it was. That version was perfect for those looking to quickly set up a basic chatroom functionality without too much complexity.
However, I’ve received some great feedback from the community, and many of you expressed interest in building a more advanced solution that supports user authentication and persists messages in the database. So, I decided to take things up a notch and create an updated version that incorporates these features.
In this guide, we’ll dive into the process of building a feature-rich chatroom application that allows users to log in, send messages, and retrieve their conversation history. By the end of this tutorial, you’ll have a solid understanding of how to integrate user authentication and database storage with your realtime chatroom.
I’ve put a lot of effort into making this guide as comprehensive and beginner-friendly as possible. Whether you’re a seasoned Laravel developer or just starting out, you’ll find the step-by-step instructions easy to follow. We’ll go through the necessary code snippets and explanations to ensure you have a clear grasp of each component.
If you have any questions, concerns, or feedback along the way, please don’t hesitate to leave a comment below. I’m here to help you out and make sure you have a smooth learning experience. Your input is valuable, and I appreciate any suggestions or ideas you might have to further enhance this guide.
For those who prefer to dive straight into the code, I’ve made it available on my GitHub repository. Feel free to clone the project, explore the codebase, and experiment with it on your own. It’s a great way to learn by example and see how everything comes together.
So, grab a cup of coffee, get comfortable, and let’s embark on this exciting journey of building an advanced realtime chatroom with Laravel. Whether you’re looking to create a chat feature for your web application or simply want to expand your Laravel skills, this guide has got you covered.
Let’s get started and unleash the power of realtime communication in your Laravel projects!
Installing Laravel
If you’re new to Laravel or need a refresher, let’s start by setting up a new Laravel installation. Laravel provides a simple and elegant way to create a new project using Composer, the dependency manager for PHP.
To create a new Laravel project, open your terminal and navigate to the directory where you want to create your project. Then, run the following Composer command:
composer create-project laravel/laravel:^11.0 lara-reverb-chat-users-database
Feel free to replace lara-reverb-chat-users-database with your desired project name. This command will create a new directory with the specified name and install Laravel 11 along with its dependencies.
Once the installation is complete, navigate into the project directory:
cd lara-reverb-chat-users-database
Next, we need to install the JavaScript dependencies required by Laravel. Laravel utilizes Node.js and npm (Node Package Manager) for this purpose. Run the following command to install the dependencies:
npm install
Setting up your database
Laravel supports various database systems, including SQLite (which comes as the default) and MySQL. For this tutorial, we’ll be using MySQL. If you prefer to use SQLite, you can skip this section.
To set up the database connection, open the .env file in the root directory of your Laravel project. Locate the following lines:
DB_CONNECTION=mysql
DB_HOST=127.0.0.1
DB_PORT=3306
DB_DATABASE=lara_reverb_chat_users_database
DB_USERNAME=root
DB_PASSWORD=
Update the DB_DATABASE value to match your desired database name. In this example, we’re using lara_reverb_chat_users_database. Make sure to create a new database with this name in your MySQL server.
Next, update the DB_USERNAME and DB_PASSWORD values to match your MySQL database credentials. If you’re using the default MySQL setup, the username is typically root, and the password may be empty or set to your MySQL root password.
After configuring the database connection, we need to run the initial database migrations. Laravel provides a convenient way to create and manage database tables using migrations. Run the following command to execute the migrations:
php artisan migrate
This command will create the necessary tables in your database based on the migration files located in the database/migrations directory.
With the database set up and the dependencies installed, you’re now ready to start building your realtime chatroom application with user authentication and database storage.
In the next sections, we’ll dive into implementing the user authentication system and integrating Laravel Reverb for realtime messaging functionality.
The Backend
Now, lets get started with all of our backend stuff. The first thing we want to do is integrate User Authentication. You can probably do this with JetStream or Breeze, but for this guides purpose we will do all manually as we dont need the other stuff that it comes with. However, when we ran our migration we got the users table, so that is already setup aswell as the User model that we will use later.
Setting up Authentication in Laravel 11
Building the Authentication Controller
In order to handle user authentication in our chatroom application, we need to create an authentication controller. Laravel makes this process a breeze with the help of the artisan command. Open your terminal and navigate to your project directory, then run the following command:
php artisan make:controller AuthController
This command will generate a new controller file named AuthController.php in the app/Http/Controllers directory.
Next, open the newly created AuthController.php file and let’s implement the necessary methods for handling login and registration.
Dont forget to add the follow use/imports for our Controller at the top
use App\Models\User;
use Illuminate\Http\Request;
use Illuminate\Support\Facades\Auth;
use Illuminate\Support\Facades\Hash;
First, we’ll add methods for showing the login and registration forms. These methods will be responsible for rendering the respective views:
public function showLoginForm()
{
    return view('auth.login');
}

public function showRegistrationForm()
{
    return view('auth.register');
}
In the showLoginForm() method, we’re returning the auth.login view, which will contain the HTML form for user login. Similarly, in the showRegistrationForm() method, we’re returning the auth.register view, which will contain the HTML form for user registration.
Now, let’s implement the methods for handling the form submissions. We’ll start with the login functionality:
public function login(Request $request)
{
    $credentials = $request->validate([
        'email' => 'required|email',
        'password' => 'required',
    ]);

    if (Auth::attempt($credentials)) {
        $request->session()->regenerate();
        return redirect()->intended('/chat');
    }

    return back()->withErrors([
        'email' => 'The provided credentials do not match our records.',
    ]);
}
In the login() method, we first validate the incoming request data using Laravel’s validate() method. We ensure that the email field is required and is a valid email address, and the password field is required.
Next, we use the Auth::attempt() method to attempt to authenticate the user with the provided credentials. If the authentication is successful, we regenerate the session to prevent session fixation attacks and redirect the user to the intended chat page (/chat).
If the authentication fails, we redirect the user back to the login page with an error message indicating that the provided credentials do not match our records.
Now, let’s implement the registration functionality:
public function register(Request $request)
{
    $validatedData = $request->validate([
        'name' => 'required|string|max:255',
        'email' => 'required|email|unique:users|max:255',
        'password' => 'required|string|min:8|confirmed',
    ]);

    $user = User::create([
        'name' => $validatedData['name'],
        'email' => $validatedData['email'],
        'password' => Hash::make($validatedData['password']),
    ]);

    Auth::login($user);

    return redirect('/chat');
}
In the register() method, we start by validating the incoming request data. We ensure that the name field is required and is a string with a maximum length of 255 characters. The email field should be required, a valid email address, unique in the users table, and have a maximum length of 255 characters. The password field should be required, a string with a minimum length of 8 characters, and should be confirmed (i.e., the user should enter the password twice for verification).
If the validation passes, we create a new User instance using the create() method. We assign the validated name, email, and password (hashed using Hash::make()) to the respective fields of the user.
After creating the user, we log them in using the Auth::login() method and redirect them to the chat page (/chat).
Let’s also add the possibility to logout.
public function logout(Request $request)
{
    Auth::logout();
    $request->session()->invalidate();
    $request->session()->regenerateToken();
    return redirect('/');
}
That’s it! We’ve now implemented the necessary methods in the AuthController for handling login and registration.
In the next steps, we’ll set up the routes for authentication and integrate the authentication functionality into our chatroom application.
Routing the Auth controller
Now that we have the AuthController in place, let’s define the routes to handle user authentication and registration. Open the routes/web.php file in your Laravel project and add the following routes:
Route::get('/login', [AuthController::class, 'showLoginForm'])->name('login');
Route::post('/login', [AuthController::class, 'login']);
Route::post('/logout', [AuthController::class, 'logout'])->name('logout');
Route::get('/register', [AuthController::class, 'showRegistrationForm'])->name('register');
Route::post('/register', [AuthController::class, 'register']);
Let’s break down each route:
Route::get('/login', [AuthController::class, 'showLoginForm'])->name('login'): This route handles the GET request to display the login form. It maps to theshowLoginForm()method in theAuthController. Thename('login')method assigns a named route ofloginto this route, which can be useful for generating URLs.Route::post('/login', [AuthController::class, 'login']): This route handles the POST request when the user submits the login form. It maps to thelogin()method in theAuthController, which authenticates the user based on the provided credentials.Route::post('/logout', [AuthController::class, 'logout'])->name('logout'): This route handles the POST request when the user clicks the logout button. It maps to thelogout()method in theAuthController, which logs out the currently authenticated user. Thename('logout')method assigns a named route oflogoutto this route.Route::get('/register', [AuthController::class, 'showRegistrationForm'])->name('register'): This route handles the GET request to display the registration form. It maps to theshowRegistrationForm()method in theAuthController. Thename('register')method assigns a named route ofregisterto this route.Route::post('/register', [AuthController::class, 'register']): This route handles the POST request when the user submits the registration form. It maps to theregister()method in theAuthController, which creates a new user account based on the provided registration data.
Make sure to place these routes in the routes/web.php file, along with any other routes you have defined for your application.
With these routes in place, users can access the login and registration forms by visiting the corresponding URLs (/login and /register). When they submit the forms, the appropriate methods in the AuthController will be invoked to handle the authentication and registration processes.
Setting up Blade Templates for Auth
Install Tailwind CSS
Tailwind CSS is a utility-first CSS framework that allows you to rapidly build custom user interfaces. To install Tailwind CSS in your Laravel project, run the following command:
npm install -D tailwindcss postcss autoprefixer
This command installs Tailwind CSS and its dependencies (postcss and autoprefixer) as development dependencies.
Create Tailwind Configuration File
Next, generate the Tailwind configuration file by running the following command:
npx tailwindcss init -p
This command creates a tailwind.config.js file in your project root and a postcss.config.js file for PostCSS configuration.
Configure Tailwind CSS
Open the tailwind.config.js file and configure the content option to specify the paths to your template files:
module.exports = {
  content: [
    './resources/**/*.blade.php',
    './resources/**/*.js',
    './resources/**/*.vue',
  ],
  // ...
}
This configuration tells Tailwind CSS to scan your Blade templates, JavaScript files, and Vue components for class names to generate the corresponding CSS.
Import Tailwind CSS
Open the resources/css/app.css file and replace its contents with the following:
@import 'tailwindcss/base';
@import 'tailwindcss/components';
@import 'tailwindcss/utilities';
It’s time to set up the frontend Blade Templates for our Auth. Run the following commands in your terminal or manually create the files
php artisan make:view auth.login
php artisan make:view auth.register
These commands will create two new Blade files: login.blade.php and register.blade.php in the resources/views/auth directory.
Create the Login form
Open the resources/views/auth/login.blade.php file and add the following code to create a login form using Tailwind CSS:
@extends('layouts.app')

@section('content')
<div class="min-h-screen flex items-center justify-center bg-gray-100">
    <div class="max-w-md w-full px-6 py-8 bg-white rounded-lg shadow-md">
        <h2 class="text-2xl font-bold mb-6">Login</h2>
        <form action="{{ route('login') }}" method="POST">
            @csrf
            <div class="mb-4">
                <label for="email" class="block text-gray-700 font-bold mb-2">Email</label>
                <input type="email" name="email" id="email" class="w-full px-3 py-2 border border-gray-300 rounded-md focus:outline-none focus:ring-blue-500 focus:border-blue-500" required autofocus>
            </div>
            <div class="mb-6">
                <label for="password" class="block text-gray-700 font-bold mb-2">Password</label>
                <input type="password" name="password" id="password" class="w-full px-3 py-2 border border-gray-300 rounded-md focus:outline-none focus:ring-blue-500 focus:border-blue-500" required>
            </div>
            <div>
                <button type="submit" class="w-full bg-blue-500 text-white font-bold py-2 px-4 rounded-md hover:bg-blue-600 focus:outline-none focus:bg-blue-600">Login</button>
            </div>
        </form>
    </div>
</div>
@endsection
This template extends the layouts.app layout and defines a login form within the content section. The form includes input fields for the user’s email and password, along with a submit button. Tailwind CSS classes are used to style the form elements and provide a visually appealing layout.
Create Registration Form
Open the resources/views/auth/register.blade.php file and add the following code to create a registration form using Tailwind CSS:
@extends('layouts.app')
@section('content')
<div class="min-h-screen flex items-center justify-center bg-gray-100">
    <div class="max-w-md w-full px-6 py-8 bg-white rounded-lg shadow-md">
        <h2 class="text-2xl font-bold mb-6">Register</h2>
        <form action="{{ route('register') }}" method="POST">
            @csrf
            <div class="mb-4">
                <label for="name" class="block text-gray-700 font-bold mb-2">Name</label>
                <input type="text" name="name" id="name" class="w-full px-3 py-2 border border-gray-300 rounded-md focus:outline-none focus:ring-blue-500 focus:border-blue-500" required autofocus>
            </div>
            <div class="mb-4">
                <label for="email" class="block text-gray-700 font-bold mb-2">Email</label>
                <input type="email" name="email" id="email" class="w-full px-3 py-2 border border-gray-300 rounded-md focus:outline-none focus:ring-blue-500 focus:border-blue-500" required>
</div>
<div class="mb-4">
<label for="password" class="block text-gray-700 font-bold mb-2">Password</label>
<input type="password" name="password" id="password" class="w-full px-3 py-2 border border-gray-300 rounded-md focus:outline-none focus:ring-blue-500 focus:border-blue-500" required>
</div>
<div class="mb-6">
<label for="password_confirmation" class="block text-gray-700 font-bold mb-2">Confirm Password</label>
<input type="password" name="password_confirmation" id="password_confirmation" class="w-full px-3 py-2 border border-gray-300 rounded-md focus:outline-none focus:ring-blue-500 focus:border-blue-500" required>
</div>
<div>
<button type="submit" class="w-full bg-blue-500 text-white font-bold py-2 px-4 rounded-md hover:bg-blue-600 focus:outline-none focus:bg-blue-600">Register</button>
</div>
</form>
</div>

</div>
 @endsection
This template is similar to the login template but includes additional input fields for the user’s name and password confirmation. The form submits a POST request to the register route when the user clicks the “Register” button.
Explanation:
- The templates extend the
layouts.applayout, which is assumed to contain the common structure and styling for your application. - The forms are wrapped in a
<div>with Tailwind CSS classes to center the content vertically and horizontally on the page. - The form elements, such as input fields and buttons, are styled using Tailwind CSS utility classes to provide a consistent and visually appealing design.
- The
@csrfdirective is used to include a CSRF token in the form to protect against Cross-Site Request Forgery attacks. - The input fields have appropriate
nameattributes that match the expected parameters in theAuthController‘sloginandregistermethods. - The forms are submitted to the corresponding routes (
loginandregister) using theroutehelper function.
Make sure to define the layouts.app layout file in the resources/views/layouts directory, which should include the necessary HTML structure and any common elements for your application. Use the code below for your layouts.app
<!DOCTYPE html>
<html lang="{{ str_replace('_', '-', app()->getLocale()) }}">
<head>
    <meta charset="utf-8">
    <meta name="viewport" content="width=device-width, initial-scale=1">
    <title>{{ config('app.name', 'Laravel') }}</title>

    <!-- Vite CSS -->
    @vite('resources/css/app.css')
</head>
<body class="antialiased">
<div id="app">
    <nav class="bg-white shadow-md">
        <div class="max-w-7xl mx-auto px-4 sm:px-6 lg:px-8">
            <div class="flex justify-between h-16">
                <div class="flex">
                    <!-- Logo -->
                    <div class="flex-shrink-0 flex items-center">
                        <a href="{{ url('/') }}">
                            <svg class="h-8 w-8 text-blue-500" xmlns="http://www.w3.org/2000/svg" fill="none" viewBox="0 0 24 24" stroke="currentColor">
                                <path stroke-linecap="round" stroke-linejoin="round" stroke-width="2" d="M12 19l9 2-9-18-9 18 9-2zm0 0v-8" />
                            </svg>
                        </a>
                    </div>
                    <!-- Navigation Links -->
                    <div class="hidden sm:ml-6 sm:flex sm:space-x-8">
                        <a href="{{ route('chat') }}" class="inline-flex items-center px-1 pt-1 border-b-2 border-transparent text-sm font-medium leading-5 text-gray-500 hover:text-gray-700 hover:border-gray-300 focus:outline-none focus:text-gray-700 focus:border-gray-300 transition duration-150 ease-in-out">
                            Chat
                        </a>
                    </div>
                </div>
                <!-- Right Navigation -->
                <div class="hidden sm:ml-6 sm:flex sm:items-center">
                    @auth
                        <form action="{{ route('logout') }}" method="POST">
                            @csrf
                            <button type="submit" class="inline-flex items-center px-3 py-2 border border-transparent text-sm leading-4 font-medium rounded-md text-gray-500 bg-white hover:text-gray-700 focus:outline-none transition ease-in-out duration-150">
                                Logout
                            </button>
                        </form>
                    @else
                        <a href="{{ route('login') }}" class="inline-flex items-center px-3 py-2 border border-transparent text-sm leading-4 font-medium rounded-md text-gray-500 bg-white hover:text-gray-700 focus:outline-none transition ease-in-out duration-150">
                            Login
                        </a>
                        <a href="{{ route('register') }}" class="ml-4 inline-flex items-center px-3 py-2 border border-transparent text-sm leading-4 font-medium rounded-md text-gray-500 bg-white hover:text-gray-700 focus:outline-none transition ease-in-out duration-150">
                            Register
                        </a>
                    @endauth
                </div>
            </div>
        </div>
    </nav>

    <!-- Page Content -->
    <main>
        @yield('content')
    </main>
</div>

<!-- Vite JS -->
@vite('resources/js/app.js')
</body>
</html>
Explanation:
- The
app.blade.phpfile serves as the main layout template for your application. - The
<head>section includes the necessary meta tags and the@vitedirective to include the compiled CSS file generated by Vite. - The
<body>section contains the main structure of your application, including a navigation bar and the main content area. - The navigation bar is styled using Tailwind CSS classes and includes links to the chat page, login, and registration pages.
- The
@authand@elsedirectives are used to conditionally display the logout button or the login and registration links based on the user’s authentication status. - The
@yield('content')directive is used to define the location where the content from the child templates (login and registration) will be injected. - The
@vitedirective is used again at the bottom of the<body>section to include the compiled JavaScript file generated by Vite.
To note here, is that we have a Chat route in the Navbar. We have not yet setup our ChatController and routes for it, but shortly will!
With these Blade templates in place, users can now access the login and registration pages, enter their credentials, and submit the forms to authenticate or create a new account.
By following these steps, you have successfully set up the frontend Blade templates for authentication in your Laravel application, utilizing Tailwind CSS for styling.
Creating our Chat Controller
OK, now we have the Auth-part sorted out, lets get into the real deal. First, lets create our ChatController by using php artisan make:controller in our terminal. This will create a new Controller that handles our chatting functions. Use the below code for our Controller.
<?php

namespace App\Http\Controllers;

use App\Events\MessageSent;
use App\Models\Message;
use Illuminate\Http\Request;
use Illuminate\Support\Facades\Auth;

class ChatController extends Controller
{
    public function index()
    {
        $messages = Message::with('user')->latest()->take(50)->get()->reverse();

        return view('chat.index', compact('messages'));
    }

    public function sendMessage(Request $request)
    {
        $request->validate([
            'message' => 'required|string',
        ]);

        $message = new Message();
        $message->user_id = Auth::id();
        $message->content = $request->input('message');
        $message->save();

        MessageSent::broadcast($message->content, $message->user_id, Auth::user()->name);

        return response()->json([
            'message' => $message->load('user'),
        ]);
    }
}
Creating our Chat view
Lets create our chat view. Run the following command:
php artisan make:view chat.indexCopy and paste this sample chat template to the newly created view
@extends('layouts.app')
@section('content')
    <div class="container mx-auto px-4 py-8">
        <div class="max-w-3xl mx-auto">
            <h1 class="text-3xl font-bold mb-4">Chatroom</h1>
            <div id="chat-messages" class="bg-white shadow-md rounded-lg p-4 mb-4 h-96 overflow-y-auto">
                @foreach ($messages as $message)
                    <div class="mb-4">
                        <div class="flex items-center mb-1">
                            <span class="font-bold mr-2">{{ $message->user->name }}</span>
                            <span class="text-gray-500 text-xs">{{ $message->created_at->format('m/d/Y h:i A') }}</span>
                        </div>
                        @if ($message->user->id === auth()->id())
                            <!-- Own message -->
                            <div class="flex justify-end">
                                <div class="bg-blue-500 text-white p-2 rounded-lg">
                                    <p class="text-sm">{{ $message->content }}</p>
                                </div>
                            </div>
                        @else
                            <!-- Other user's message -->
                            <div class="flex justify-start">
                                <div class="bg-gray-200 text-gray-800 p-2 rounded-lg">
                                    <p class="text-sm">{{ $message->content }}</p>
                                </div>
                            </div>
                        @endif
                    </div>
                @endforeach
            </div>
            <form id="chat-form">
                <div class="flex">
                    <input type="text" name="message" id="messageInput" class="flex-grow border border-gray-300 rounded-l-lg px-4 py-2 focus:outline-none focus:ring-2 focus:ring-blue-500" placeholder="Type your message..." required>
                    <button type="button" onclick="window.sendMessage()" class="bg-blue-500 text-white rounded-r-lg px-4 py-2">Send</button>
                </div>
            </form>
        </div>
    </div>
@endsection
Routing our ChatController
Add the following lines to your web.php to apply routes for our Chat Controller
Route::get('/chat', [ChatController::class, 'index'])->name('chat');
Route::post('/chat/send', [ChatController::class, 'sendMessage'])->name('chat.send')->middleware('auth');
Now, our chat controller is ready to be used. Lets continue with our model
Creating the Message Model and our Database Migration for it
Now that we have the chat interface set up, let’s create the Message model and the corresponding database migration to store the chat messages.
To create the Message model and the migration file, run the following command in your terminal:
php artisan make:model Message -m
This command will generate two files:
app/Models/Message.php: TheMessagemodel file.database/migrations/YYYY_MM_DD_HHMMSS_create_messages_table.php: The migration file for creating themessagestable.
Open the migration file (YYYY_MM_DD_HHMMSS_create_messages_table.php) and replace its contents with the following code:
<?php

use Illuminate\Database\Migrations\Migration;
use Illuminate\Database\Schema\Blueprint;
use Illuminate\Support\Facades\Schema;

return new class extends Migration
{
    /**
     * Run the migrations.
     */
    public function up(): void
    {
        Schema::create('messages', function (Blueprint $table) {
            $table->id();
            $table->unsignedBigInteger('user_id');
            $table->text('content');
            $table->timestamps();

            $table->foreign('user_id')->references('id')->on('users')->onDelete('cascade');
        });
    }

    /**
     * Reverse the migrations.
     */
    public function down(): void
    {
        Schema::dropIfExists('messages');
    }
};
Explanation:
- The
upmethod is executed when running the migration. It creates themessagestable using theSchemafacade. - The
messagestable has the following columns:id: The auto-incrementing primary key.user_id: An unsigned big integer column to store the ID of the user who sent the message. This column is a foreign key referencing theidcolumn of theuserstable.content: A text column to store the content of the message.timestamps: Columns to store the creation and update timestamps of the message.
- The
foreignmethod is used to define the foreign key constraint on theuser_idcolumn. It specifies that theuser_idcolumn references theidcolumn of theuserstable and sets theonDeleteaction tocascade, which means that if a user is deleted, their associated messages will also be deleted. - The
downmethod is executed when rolling back the migration. It drops themessagestable using theSchemafacade.
After defining the migration, run the following command to execute the migration and create the messages table in your database:
php artisan migrate
Next, open the Message model file (app/Models/Message.php) and add the following code:
<?php

namespace App\Models;
use Illuminate\Database\Eloquent\Model;


class Message extends Model
{
    use HasFactory;

    protected $fillable = ['user_id', 'content'];

    public function user()
    {
        return $this->belongsTo(User::class);
    }
}

}
Explanation:
- The
Messagemodel extends theModelclass provided by Laravel’s Eloquent ORM. - The
$fillableproperty specifies the attributes that are mass assignable. In this case, we allow theuser_idandcontentattributes to be mass assigned. - The
usermethod defines abelongsTorelationship between theMessagemodel and theUsermodel. It indicates that a message belongs to a user.
With the Message model and migration in place, you can now store and retrieve chat messages from the database.
Remember to update the ChatController to use the Message model for storing and retrieving messages, and modify the chat interface to display the actual messages from the database.
By following these steps, you have successfully created the Message model and the corresponding database migration for your chat application.
Integrating Real-time messaging with Reverb and Echo
Installing Laravel Reverb
Installing Laravel Reverb is very straightforward. Use the following command in your terminal:
php artisan install:broadcasting
and select Yes to install Laravel Reverb. You also want to edit your .env file and replace BROADCAST_CONNECTION to be reverb
Set up JavaScript for our Frontend
Creating a seamless user experience in a chatroom requires real-time interactions. To facilitate this, we incorporate JavaScript to handle message sending and receiving dynamically. In this section, we’ll walk through setting up our JavaScript files to make our chatroom lively and interactive.
Creating the chat-scripts.js
To keep our JavaScript organized and maintainable, we create a separate file named chat-scripts.js. This file will contain all the necessary code for our chat functionalities. Here’s what we’ll add to it:
- Real-time Listening with Laravel Echo: We use Laravel Echo to listen for message events. Whenever a message.sent event is broadcasted, we catch this event in real time and update our chatroom’s UI to display the new message.
- Sending Messages: We include a function to handle message sending. When a user types a message and hits the send button, this function captures the message, sends it to the server using Axios for an asynchronous HTTP request, and then clears the input field, readying it for the next message.
Create a new file called chat-scripts.js in resources/js/ and paste the below code:
window.Echo.channel('chatroom')
    .listen('.message.sent', (e) => {
        console.log(e);
        // Assuming e.message contains the message content, e.user_id contains the user ID of the sender,
        // and e.user_name contains the user's name
        const messagesContainer = document.getElementById('chat-messages');
        const isCurrentUser = e.user_id === window.userId; // Ensure window.userId is set to the current user's ID when the page loads

        const messageDiv = document.createElement('div');
        messageDiv.classList.add('mb-4');

        const authorDiv = document.createElement('div');
        authorDiv.classList.add('flex', 'items-center', 'mb-1');

        const authorSpan = document.createElement('span');
        authorSpan.classList.add('font-bold', 'mr-2');
        authorSpan.innerText = e.name;

        const timestampSpan = document.createElement('span');
        timestampSpan.classList.add('text-gray-500', 'text-xs');
        timestampSpan.innerText = new Date().toLocaleString(); // You can format the timestamp as needed

        authorDiv.appendChild(authorSpan);
        authorDiv.appendChild(timestampSpan);

        const messageContentDiv = document.createElement('div');
        messageContentDiv.classList.add('flex');
        messageContentDiv.classList.add(isCurrentUser ? 'justify-end' : 'justify-start');

        const messageBodyDiv = document.createElement('div');
        messageBodyDiv.classList.add(isCurrentUser ? 'bg-blue-500' : 'bg-gray-200', 'text-gray-800', 'p-2', 'rounded-lg');
        if (isCurrentUser) {
            messageBodyDiv.classList.remove('text-gray-800');
            messageBodyDiv.classList.add('text-white');
        }

        const messageP = document.createElement('p');
        messageP.classList.add('text-sm');
        messageP.innerText = e.message;

        messageBodyDiv.appendChild(messageP);
        messageContentDiv.appendChild(messageBodyDiv);

        messageDiv.appendChild(authorDiv);
        messageDiv.appendChild(messageContentDiv);

        messagesContainer.appendChild(messageDiv);
        messagesContainer.scrollTop = messagesContainer.scrollHeight; // Scroll to the bottom of the chat messages container
    });

window.sendMessage = function() {
    const messageInput = document.getElementById('messageInput');
    const message = messageInput.value.trim();
    if (message === '') return; // Prevent sending empty messages

    axios.post('/chat/send', { message: message })
        .then(response => {
            console.log(response.data);
            messageInput.value = ''; // Clear the input field after sending
        })
        .catch(error => console.error(error));
    console.log('sent message');
};
Then, add the import of this file to app.js
import './chat-scripts'We also need our userId as a window variable, add the following code to our layouts/app.blade.php
  <script>
        window.userId = {{ auth()->id() }};
    </script>
Setting up the Event for MessageSent
Let’s create an event that will be triggered when a new message is sent. This event will be responsible for broadcasting the message to the Reverb channel.
Create a new file named MessageSent.php in the app/Events directory and add the following code:
<?php

namespace App\Events;

use Illuminate\Broadcasting\Channel;
use Illuminate\Broadcasting\InteractsWithSockets;
use Illuminate\Contracts\Broadcasting\ShouldBroadcastNow;
use Illuminate\Foundation\Events\Dispatchable;
use Illuminate\Queue\SerializesModels;

class MessageSent implements ShouldBroadcastNow
{
    use Dispatchable, InteractsWithSockets, SerializesModels;

    public $message;
    public $user_id;
    public $name;

    /**
     * Create a new event instance.
     */
    public function __construct($message, $user_id, $name)
    {
        $this->message = $message;
        $this->user_id = $user_id;
        $this->name = $name;
    }

    /**
     * Get the channels the event should broadcast on.
     *
     * @return array
     */
    public function broadcastOn(): array
    {
        return [
            new Channel('chatroom'),
        ];
    }

    public function broadcastAs(): string
    {
        return 'message.sent';
    }
}
Explanation:
- The
MessageSentevent class implements theShouldBroadcastNowinterface, which indicates that the event should be broadcast immediately after it is triggered. - The event class uses the
Dispatchable,InteractsWithSockets, andSerializesModelstraits, which provide useful functionality for event handling and broadcasting. - The event has three public properties:
$message,$user_id, and$name, which will hold the message content, the ID of the user who sent the message, and the name of the user, respectively. - The
__constructmethod is the constructor of the event class. It accepts the$message,$user_id, and$nameparameters and assigns them to the corresponding properties. - The
broadcastOnmethod specifies the channels on which the event should be broadcast. In this case, we are broadcasting the event on a channel named'chatroom'. - The
broadcastAsmethod specifies the name of the event that will be used when broadcasting. In this case, the event will be broadcast as'message.sent'.
Add the Channel to our channels.php
Finally! Almost done, lets add the chatroom channel to our channels.php. Enter your routes/channels.php and you are done
Broadcast::channel('chatroom', function () {
    return true;
});
Summary
The article provides a step-by-step guide on building an advanced real-time chatroom application using Laravel Reverb, with user authentication and database storage for messages. Now, you should have a fully functional chatroom with user authentication, real-time messaging, and message persistence in the database.
Leave a Reply